
Last updated November 18, 2026
 Hardwood
 Engineered hardwood
 Luxury vinyl plank
 Laminate
 Porcelain tile
 Carpet
 Shaw
 Mohawk
 COREtec
 Pergo
Free in-home measure and written estimate: Shaw, Mohawk, COREtec and Pergo lines compared on your own rooms, with carpet, tile, vinyl plank, laminate and hardwood laid out side by side
Get your free estimateHow to Prepare Your Home for a Flooring Installation in Summerlin
Here’s the part of a flooring project nobody puts on a mood board: the three days before the crew arrives. A crew that shows up to furniture still in the room, baseboards that weren’t pre-painted, or a subfloor with moisture nobody mentioned will either charge you more or leave and come back later. Both outcomes cost you more than a weekend of prep would have. “Ready for install” isn’t a feeling. It’s a specific condition your rooms either meet or don’t. This guide defines that condition room by room, covering acclimation, what actually gets moved, the subfloor checks you can make yourself, and why Summerlin’s climate asks a little extra of you before material comes through the door.
Quick Answer
To prepare for a flooring installation in Summerlin, clear every room down to bare floor, remove baseboards and doors where the installer asks, get hardwood or engineered product into the home 48-72 hours ahead so it can acclimate, and run your HVAC at normal living temperature from material delivery through install. Confirm the subfloor is dry and flat before the crew arrives, and plan for each room to be out of service for one to three days. A free in-home estimate is where all of this gets spelled out in writing for your specific rooms.
Styles & brands we work with
- Hardwood
- Engineered hardwood
- Luxury vinyl plank
- Laminate
- Porcelain tile
- Carpet
- Shaw
- Mohawk
- COREtec
- Pergo
Table of Contents
- The Acclimation Window: Why 48-72 Hours Matters
- What “Clear the Room” Actually Means
- Pre-Install Subfloor Inspection You Can Do Yourself
- HVAC and Summerlin’s Dry Heat
- Pets, Kids, and Working From Home During Install
- What to Have Ready on Install Day
- A Realistic Preparation Timeline
- Common Mistakes to Avoid
The Acclimation Window: Why 48-72 Hours Matters
Hardwood and engineered wood need 48-72 hours inside your Summerlin home before installation begins. This isn’t padding on the schedule. It’s the step that lets the material settle into the temperature and humidity of your actual house rather than the warehouse it shipped from.
Summerlin homes run dry. The desert air outside and the conditioned air inside hold very different amounts of moisture than a distributor’s warehouse, and wood moves with humidity. If boards are cut and locked in before they’ve adjusted, the floor can gap when the air dries further or cup when a monsoon pushes humidity up. Engineered products have a more stable core, but the same principle applies: the material wants to be in the room, at living conditions, before it becomes a floor.
What happens if this step gets skipped? Sometimes nothing you notice. Sometimes a floor that looked tight on install day develops problems a month later, and by then the conversation is a headache instead of a phone call. Your installer will tell you when material should be delivered and where to stack it. Follow that. Stacked boxes need air around them, so don’t shove the pallets into a corner against a wall.
A few things that help acclimation go smoothly:
- Have the delivery placed in the room where it will be installed, not the garage. Garages in Summerlin can run far hotter than the house.
- Keep the HVAC running at the temperature you’d normally live in. Not 65 to freeze the house, not off while you’re away.
- Don’t open windows to “air things out” during the acclimation window. Desert air is dry, but the swings between day and night are wide.
- Stack boxes no more than the manufacturer’s packaging recommends, with space to breathe.
Your written estimate should confirm whether acclimation time is built into your schedule. If you’re weighing a Flooring Summerlin quote against another, ask that question directly. It tells you a lot about how the job will be run.
What “Clear the Room” Actually Means
Clear the room means every piece of furniture, every rug, every box, and everything hanging on the walls that could be knocked is out before the crew arrives. It does not mean “shoved against one wall.” Installers need the full floor and both feet of working space on every side.
Here’s the split most homeowners don’t get told clearly:
What installers typically handle: moving large furniture that’s already agreed on in the estimate, pulling existing carpet and pad, removing tack strip, and setting new trim back in place if trim work is part of the job.
What you should move: small furniture, electronics, wall art, lamps, decor, floor plants, area rugs, closet contents, and anything breakable or valuable. The default is: if you’d carry it yourself, carry it out.
What never gets moved regardless: safes, pianos, aquariums with water in them, gun safes, and anything too heavy or too fragile for a two-person crew to handle safely. Those come out before the crew arrives or the room doesn’t get floored. If you can’t move it, reschedule or plan around it, but don’t expect the installer to figure it out on the day.
Also worth knowing: appliances. Refrigerators, washers, dryers, and stoves often stay because hooking them back up is plumbing or gas work. Your installer will tell you at the estimate whether they disconnect and reset appliances or whether you need to arrange that separately. In Summerlin kitchens, refrigerators are the usual sticking point because they’re heavy and full. Empty them and move what you can the night before.
Bottom line: the estimate conversation should end with a specific list of what you move and what the crew moves. If it doesn’t, ask for one in writing.
Pre-Install Subfloor Inspection You Can Do Yourself
Most subfloor surprises are visible before the crew arrives if you know what to look at. The work itself is not a DIY job, but the checks are. Here’s a simple list to walk before install day.
- Walk the whole floor in socks. Feel for soft spots, dips, or anywhere the floor bounces. Bouncy areas mean an underlying subfloor issue that will telegraph through the new floor if it isn’t addressed.
- Look for water staining or discoloration on the existing floor. Old water damage often shows as dark patches or curling edges, especially around sinks, exterior doors, and under appliances. Point it out at the estimate.
- Check for moisture at slab level. If your home is on slab and the new floor will sit on it, moisture from below matters. A professional uses a moisture meter to confirm this before install. If anything has ever felt damp, or if you’ve had a leak in that room, say so at the estimate.
- Look at door thresholds and floor transitions. Note where one flooring meets another, and where the new floor will meet doors. If a door drags on the current floor, it may need trim or adjustment.
- Check baseboards and shoe molding. Look at the paint, the caulk, and the gaps. If baseboards are being removed and reinstalled, plan to repaint them after. Pre-painting new trim before install is often a smarter order of operations than painting on top of a finished floor.
- Note squeaks. Old squeaks can be tightened if the crew knows where they are. Mark them with tape.
For tile flooring installation, the flatness of the subfloor matters more than most people realize, especially with larger format tiles. You won’t fix that yourself. The point of these checks is to surface the questions at the estimate, not on the morning of install.
HVAC and Summerlin’s Dry Heat
Your HVAC should be running at normal living temperature before material delivery and stay running through the entire install. This is the single most overlooked preparation step in Summerlin, and it’s because of how dry and hot the air here gets.
Three reasons it matters:
- Acclimation is temperature and humidity. Wood and engineered product settle into the air in your home. If your HVAC is off and the house is at 95 degrees before material delivery, the material is settling into that air, not the air you actually live in. The adjustment happens twice.
- Adhesives and finishes want normal conditions. What an adhesive or finish needs is set by the product instructions and your installer, but a house running significantly hotter or colder than living temperature is a house where a crew may have to adjust the schedule.
- Comfort while crew is working. Installers doing a two- or three-day job in a Summerlin home in July without air conditioning are doing a hard job harder. It affects how careful the work is. Keep the system running.
One thing to look at before install: your return air filter. If it’s due for a change, change it before the crew arrives. There will be dust. A clean filter helps the system keep up and helps the indoor air during install.
Your written estimate should note whether the install is scheduled with the home occupied or vacant. If you’re going on a trip during the install, the HVAC still needs to run at normal temperature the whole time. Plan the thermostat accordingly.
Pets, Kids, and Working From Home During Install
A realistic multi-room flooring install takes one to three days per project, depending on square footage, product, and room count. That’s not a subtle change to your household routine. Plan for it like a move, not like a delivery.
Pets. Cats and dogs should be out of the work zone entirely, ideally in a closed room the crew won’t be working in or at a sitter’s house. Doors open and close, tools are out, and adhesive and finish odors are in the air. If your pet is anxious, boarding for the install window is the kinder call. In Summerlin, that means having the boarding plan set before material delivery, not on install morning.
Kids. Small children should be off the work floor. The rooms being installed are a construction zone. Plan a closed-door play area, or plan for a family member to take them out. If a room being installed is a shared kids’ bedroom, expect a couple of nights of rearranged sleeping.
Working from home. If your job is on calls or video, a two-day install in the room you work from won’t work. Clear the room first. Then decide whether you’ll work from a temporary setup (a kitchen table, a bedroom) or take the days off. A quiet guest room, second bedroom, or borrowed office space is a better plan than trying to conduct a meeting while a nail gun is running in the next room.
For a carpet installation, the disruption is smaller because a single carpeted room can often be finished in a day. Tile and hardwood are slower, roomier jobs. Either way, the schedule is set at the estimate. Call (844) 320-6715. We answer 24/7. Fast dispatch from 7am to 7pm, Sunday through Friday.
What to Have Ready on Install Day
Install day goes faster if you’ve thought through the small stuff. Here’s the list we walk through with homeowners at the estimate.
- A cleared path from the front door to the work area. Staircases, halls, and doorways should be clear. Material and tools come through the front or garage door and the path shouldn’t involve moving anything.
- A place for the crew to park. If you’re in a gated community, let the gate know a crew is coming in. Have the access code ready.
- Somewhere for people to be while work is happening. A room that isn’t being installed where household members can be. Have the TV, WiFi router, and any home office gear set up somewhere else.
- Water for the crew. Not a rule, just a neighborly one, especially in a Summerlin summer.
- The name and number of who to call with questions. Yours, and theirs. Have it on hand.
- A quick walkthrough before work starts. The crew lead will want to see the rooms before pulling material. Point out the marks, the squeaks, and any spot you flagged at the estimate.
- A plan for old material. Where does the old carpet, pad, or tile go? Confirm at the estimate whether haul-away is included. If it isn’t, plan for a dumpster or a hauling service.
Expect dust. Even a careful install produces some. Cover or move anything you don’t want dust settling on, and plan a light dusting of the surrounding rooms the day after install finishes.
A Realistic Preparation Timeline
The prep before install happens in stages, not on one day. Here’s roughly how it should look, working backward from your install date.
- Two to three weeks before install: finalize the product selection and confirm the estimate in writing. This is where the differences between Shaw, Mohawk, COREtec, and Pergo become real for your specific rooms. Ask which product fits each room’s traffic, humidity, and how you actually use the space.
- Two weeks before install: schedule the material delivery into the room it will be installed in. Confirm HVAC will run at living temperature from delivery through install.
- One week before install: start clearing rooms. Move small items, empty closets, take down wall art. Rent a storage unit or a POD if you need a place for displaced furniture.
- Three to four days before install: remove remaining items, and prep for pets, kids, and workspace transitions. Change the HVAC filter.
- Two to three days before install: material arrives and acclimates for 48-72 hours. HVAC stays running at normal temperature.Nothing gets opened during acclimation. Let the material sit.
- The day before install: final walkthrough. Confirm baseboards, trim, and doors are prepped. Confirm the crew’s access plan.
- Install day: crew lead walks the rooms, notes any last-minute issues, and work starts.
If you’re redoing multiple rooms in Summerlin at once, stagger the schedule so you’re not out of a kitchen or a bathroom for the whole project. The written estimate is where that schedule lives.
Refinishing Existing Hardwood Instead of Replacing It
If you have existing hardwood floors in decent shape, refinishing is worth asking about before you decide to replace. It restores the floor you already have and it’s often a smarter option than tearing out and starting over. Whether it works for your specific floors depends on the thickness of the wood and its condition, which is checked at the estimate visit.
The preparation is easier, all things considered. The rooms still get cleared. Furniture still moves. But you’re not waiting on material delivery and acclimation for a new floor, because you already have the floor. Baseboards come off or get protected. You’ll want to be out of the refinished rooms while finish work dries or cures, and the timing is set by the product instructions and your estimate.
Watch the floor through a Summerlin summer. If a room is getting a lot of dry-season traffic and the wood is cupping, or the finish has worn to bare wood in patches, refinishing may not be the right answer for that room. Ask directly. A pre-refinishing walkthrough answers it.
Common Mistakes to Avoid
- Stacking material in the garage. Garages in Summerlin get hot fast, and a stack of boxes sitting in the garage isn’t acclimating to your house, it’s acclimating to the garage. Material goes inside, in the room where it goes down.
- Running the HVAC off during acclimation or install. Turning the system off while the crew works or while you’re away changes the conditions the floor is setting into. Keep it running at living temperature from material delivery through install.
- Shoving furniture into one corner and calling the room “clear.” Installers need the whole floor and working space around it. A room isn’t clear until it’s bare.
- Not removing safes, pianos, or aquariums. No crew is moving these. If you don’t arrange to move it, the room doesn’t get floored, or the job gets rescheduled.
- Pre-painting baseboards after install instead of before. Painting trim after the floor is down means cutting in around new material and the risk of drip on a fresh surface. Pre-paint where you can, and finish the final coat before the trim goes back.
- Skipping the moisture check on a slab floor. If you’ve ever had a plumbing leak in that room, or the floor has ever felt damp, say so at the estimate. It changes the plan.
- Planning around a work-from-home schedule that doesn’t allow for the disruption. A two-day install in your home office is not a two-day install you can work through. Plan around it or move the workspace.
- Assuming haul-away is included. Confirm at the estimate whether old carpet, pad, and tile get taken away. If they don’t, plan the dumpster or hauling service in advance.
See the difference
 Before
 After
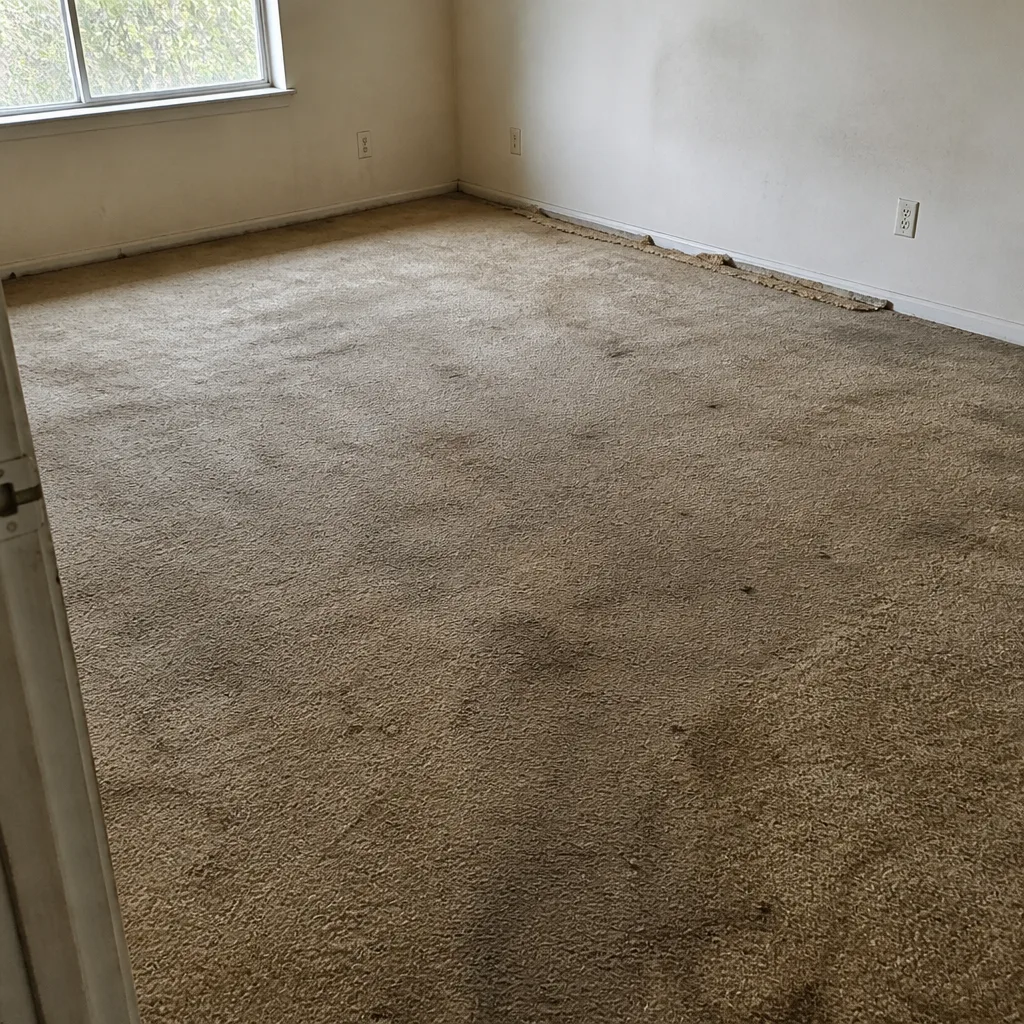 Before
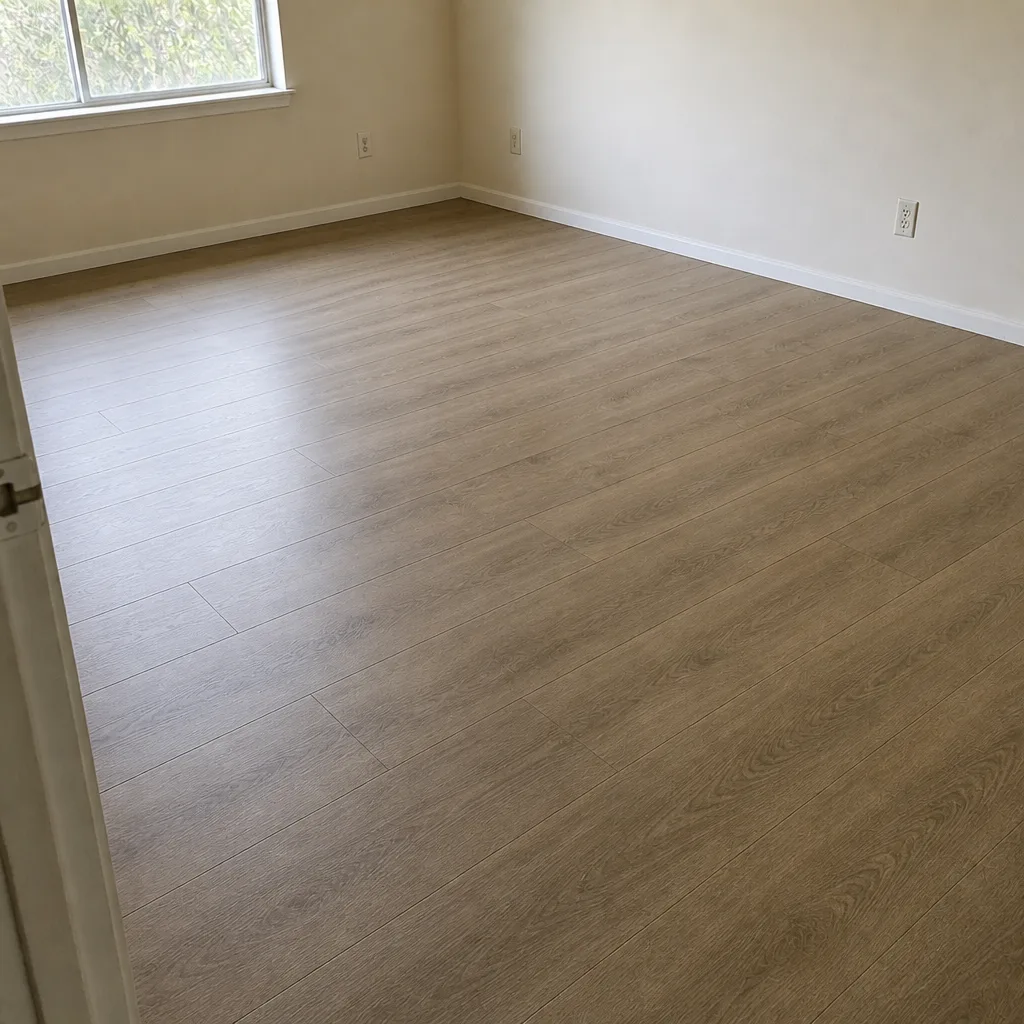 After
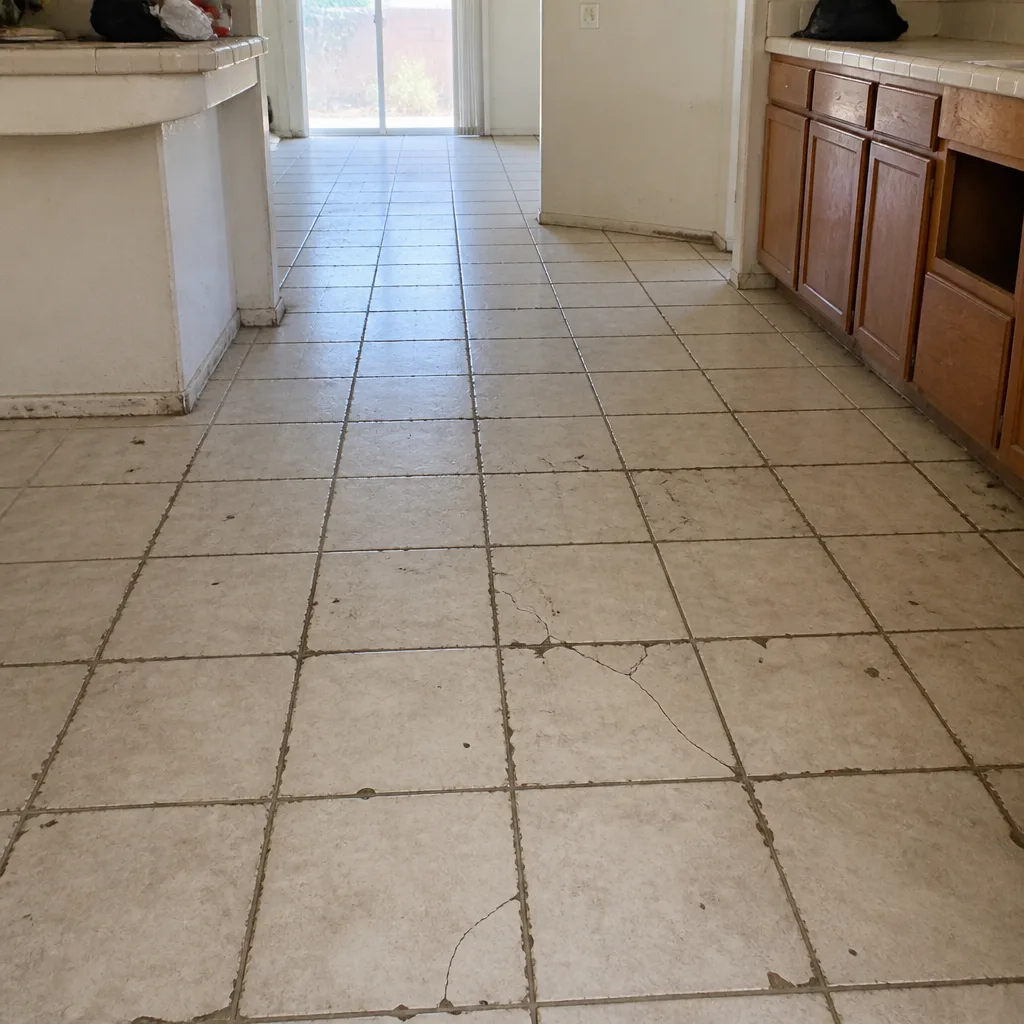 Before
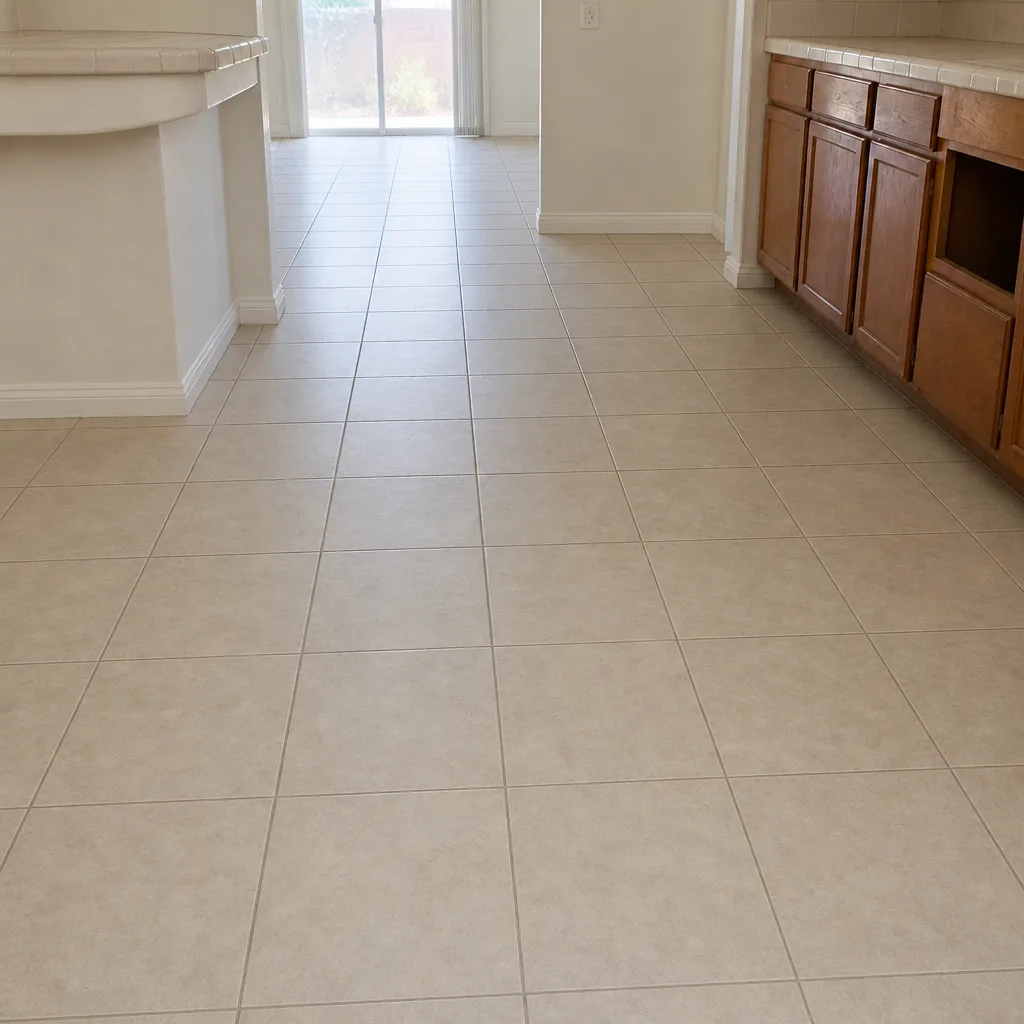 After
When to Call a Professional
Call us when you’ve decided what needs to happen but want someone to walk the rooms and confirm the plan. That’s what the free estimate is for. We come out, look at the subfloor, check the door clearances, and write a specific scope of work with pricing on it. If you’re weighing refinishing against replacement on existing hardwood, the estimate answer is where that decision gets made. If you have a whole-home floor project in front of you and no idea what order the rooms go in, that’s also the conversation.
Flooring Summerlin offers free estimates in Summerlin: call (844) 320-6715. We answer 24/7. Fast dispatch from 7am to 7pm, Sunday through Friday. Our technicians have up to 9 years of experience, and every job we do is a flooring job. Nine brands, one specialty.
Frequently Asked Questions
A realistic multi-room installation takes one to three days per project, depending on square footage, product, and how many rooms are being done. A single carpeted room can often be finished in one day. The specific schedule for your home is set at the estimate, once the rooms and products are confirmed.
Yes, for the rooms being installed, down to bare floor. Installers move some large furniture if that’s part of the estimate scope, but small furniture, decor, closet contents, and anything breakable come out before the crew arrives. Safes, pianos, and aquariums with water in them should be arranged separately, because no crew moves those.
Hardwood and engineered wood should sit inside your home for 48-72 hours before install, at normal living temperature. This lets the material adjust to your house’s conditions rather than the distributor’s warehouse. During that window, keep your HVAC running and don’t open the packaging.
Your home should be at the temperature you’d normally live in, and stay there from material delivery through install. In Summerlin, that means HVAC running, not off. It matters for acclimation, for adhesives and finishes, and for the crew doing the work.
Yes, most homeowners do, but the rooms being installed are a construction zone and off limits while work is happening. Plan a room to retreat to, plan around pets and kids, and plan a workspace if you work from home. If you’d rather be out, the schedule still needs to run with HVAC on.
Not always. It depends on the product and the installer. Some installs work fine with baseboards in place and shoe molding added; others want the baseboards off and reset. The estimate should confirm what applies to your rooms. If baseboards are coming off, pre-paint new or existing trim where you can, and plan the final coat for before the trim goes back down.
Ask at the estimate. Whether refinishing works depends on the thickness of the wood and its condition, which is checked at the estimate visit. Refinishing is worth considering for floors that are structurally sound and running into finish wear. Replacement makes sense when the wood is too thin to refinish or has damage that won’t come out. Both are legitimate answers; the floor decides.
The Bottom Line
Preparation is the difference between a flooring install that runs on schedule and one that costs you extra time or money. The short version: clear rooms down to bare floor, get material inside in the room where it will be installed, run the HVAC at living temperature from delivery through install, and give hardwood or engineered product 48-72 hours to acclimate. Check the subfloor, flag any moisture, and get the plan for baseboards, appliances, and haul-away confirmed in writing before install day. If you’re weighing refinishing existing hardwood against new floors, that’s an estimate conversation too.
Getting the prep right is mostly a matter of someone telling you specifically what “ready” means for your rooms. That’s what the estimate is for. Call Flooring Summerlin at (844) 320-6715 for a free estimate. We answer 24/7. Fast dispatch from 7am to 7pm, Sunday through Friday. Our technicians have up to 9 years of experience, and when we do a job, it’s a flooring job.
Written by the team at Flooring Summerlin.